Rates
Overview
The rates page contains current and historical rate information for employees. Each rate is date sensitive and can be added on a scheduled basis. Every employee needs to have an active rate with a ‘Base’ rate code at all times so that the system can correctly process payroll information.
Alternate rate codes can be used when employees have multiple rates of pay based on different work performed. Rate codes other than ‘Base’ can be imported or keyed into payroll and the corresponding rate will be paid and any associated cost center allocation automatically applied.
It is also possible for Alliance Payroll to configure your payroll system so that the rate code is automatically applied based on which department a paycheck line item is being allocated to. This alternate rate code calculation method is good for companies that want to base the rate code on a department instead of basing the department on the rate code.

Fields on this page:
• Rate Code – The rate code for this rate. For the employee's default rate of pay, the rate code is called "Base".
• Start Date – The date that the rate begins. If left blank, this will default to today's date. Note that no two records with the same rate code should have overlapping start and end dates.
• End Date – The date that the rate ends. If left blank, this will default to 12/31/2100 (forever).
• Rate – The employee’s rate of pay.
• Salary – For salary employees, this is the per pay period salary amount.
• Rate Per – Indicates the period for which the rate is applicable. The choices are Hour, Day, Mile and Piece.
• Annualized Salary – A calculation based on the employee’s pay frequency, salary, base rate and default hours. This number is not editable and is provided as a convenience only. It has no effect on an employee’s paychecks.
• Shift – The shift code for this rate. Shift codes can apply an hourly premium flat amount and/or multiplier to the rate.
• Cost Centers (This example uses “Location” and “Department”.) – When the employee is paid using this rate, the labor will be allocated to the selected cost center. The system allows up to five levels of cost centers that can each have a customized name. Only those levels that are in use are shown, thus you will see between one and five choices on this page. Company-specific cost centers can be set up on the Company, Departments tab.
Pay Settings
Note: The pay settings listed here are provided as a convenience. These settings are not tied to an individual rate line item; as such these settings are not sensitive to the selected rate’s start and end date. When changed this item is changed at the employee’s base record level.
• Auto Pay – The auto pay status for the employee. If set to Salary or Hours, the employee may be paid automatically when a payroll batch is started with the Auto Pay check box checked. Set to blank for employees that should not be paid automatically.
• Default Hours – The number of hours an employee is recorded to have worked when auto paid.
• Pay Frequency – Specifies the number of times per year an employee gets paid.
Adding a new rate
To add a new rate, first click the ‘Add Rate’ button on the Rates page. The following screen will appear:
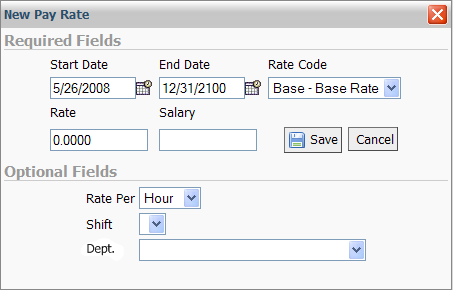
ü The start date defaults to today’s date. The end date defaults to 12/31/2100 (forever). The rate code defaults to ‘Base’. First make sure that these dates are correct.
ü Next, key the new desired rate and/or per pay period salary.
ü If necessary, key in the Rate Per, Shift and any Cost Centers (note: the company depicted in this example has one level of cost center called ‘Dept.’. It is possible to have up to five cost centers set up for your company, in which case there would be four more drop down lists below the ‘Dept.’)
ü Press the Save button when complete.
Adding a new rate with an associated review
To add a new rate, first click the ‘Add Rate & Review’ button on the Rates page. The following screen will appear:
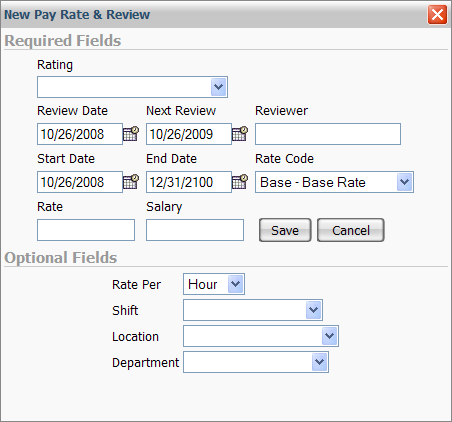
ü Choose the desired ‘Rating’ from the drop down list.
ü The start date defaults to today’s date. The end date defaults to 12/31/2100 (forever). The rate code defaults to ‘Base’. First make sure that these dates are correct.
ü Type the name of the Reviewer
ü Next, key the new desired rate and/or per pay period salary.
ü If necessary, key in the Rate Per, Shift and any Cost Centers (note: the company depicted in this example has one level of cost center called ‘Dept.’. It is possible to have up to five cost centers set up for your company, in which case there would be four more drop down lists below the ‘Dept.’)
ü Press the Save button when complete. A new rate and a new review record will be added to the system.