Create Manual Check
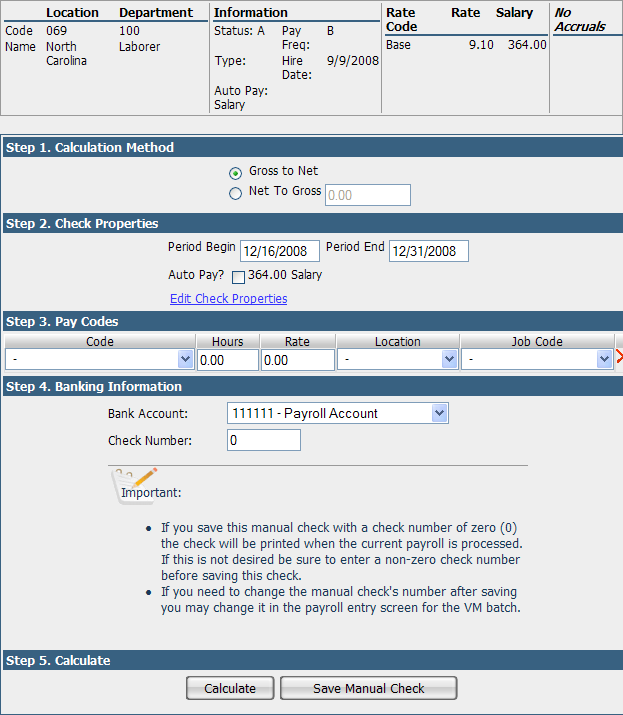
This page allows you to create a check outside of the regular payroll. It is organized into a step-by-step checklist. Whenever a manual check is saved, it is automatically stored in a VM (Void/Manual) batch that can be processed with your next payroll so the employee’s year-to-date file is updated with the appropriate wage and tax amounts.
The upper section shows you the pertinent payroll information for the current employee.
Step 1 – Calculation Method
Choose the calculation method for the check. Gross to Net is the default. If you choose Net to Gross, you must enter the desired net amount in the box.
Step 2 – Check Properties
Enter the Period Begin and End dates for the check. Check the Auto Pay? box, if applicable. Click the Edit Check Properties link to edit the paycheck attributes. Please see the help topic for Employee Pay Entry for more information.
Step 3 – Pay Codes
Choose the Code and fill in the Hours and Rate applicable to it. Choose the Field Selection link at the top right of this page to edit the fields to show. Please see the help topic for Employee Pay Entry Field Selection for more information. You may enter multiple lines as applicable. Press the red X to delete a line.
Step 4 – Banking Information
Choose the Bank Account from which to cut the manual check. Assign a Check Number as needed. If you save this manual check with a check number of zero (0), the check will be printed when the current payroll is processed. If this is not desired, be sure to enter a non-zero check number before saving this check. If you need to change the manual check's number after saving, you may change it in the payroll entry screen for the VM batch.
Step 5 – Calculate
Press the Calculate button to view the calculated check. Press the Save Manual Check button to save it in the VM batch.